Secure online payments to make your lives easier.
We encourage you to take advantage of this efficient and cost saving way of working together. We’ve invested in this technology to ensure we can continue to give you the best pricing, service and value available.
Our billing portal is the perfect way to:
- View and print your current invoices
- Pay your invoices by e-check or credit card
- Access invoice history and payment history
- Set up AutoPay for monthly services
- Schedule future payments
View our quick “How-To” guide below.
Please note: To pay by invoice number using Quick Pay, you’ll need to make sure that your email address is already registered with your company.
Portal Instructions.
A Quick “How-To” Guide – Download in PDF format here if you’d like to keep this handy.
First Time Users
Requesting Access
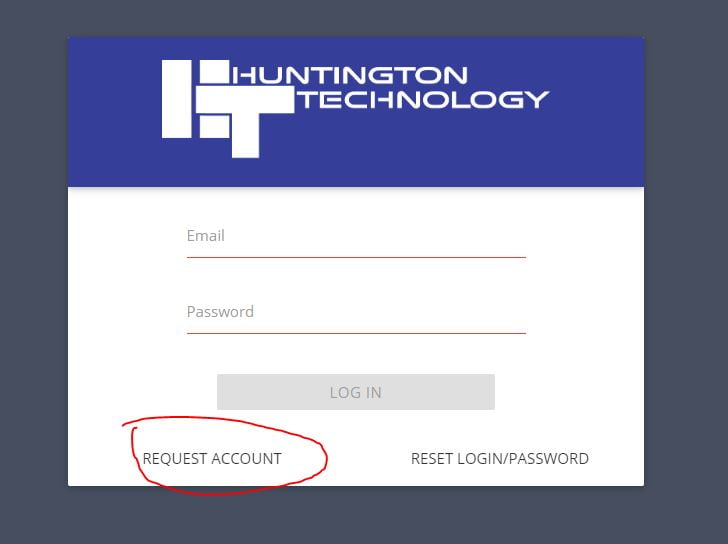
If you’re a first time user, you’ll need to first request access for an account. On the login page, click on Request Access.
On the following page you’ll fill in the fields with the appropriate information for you and your business, complete the security challenge, and click the Request Access button.
Once we receive your request, we’ll create a secure account specific to you and your business with access to all of your invoices, payments, and any other related activity and send you over your login information.
Viewing + Paying Invoices
Dashboard
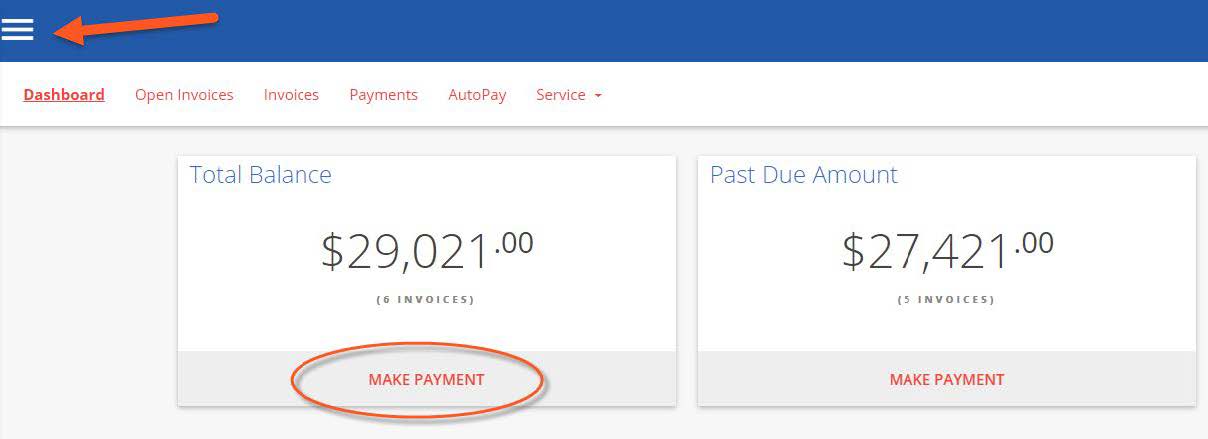
This is the first thing you will see when logging in, known as the “Dashboard” portal section.
● From here you may quickly view invoices and make payments using the prominent tiles.
○ The tiles will link to the same “Open Invoices” portal segment.
● Using the three bar menu, you may change your password, logout, or “change companies” if applicable.
Open Invoices
Click the “OPEN INVOICES” menu option:
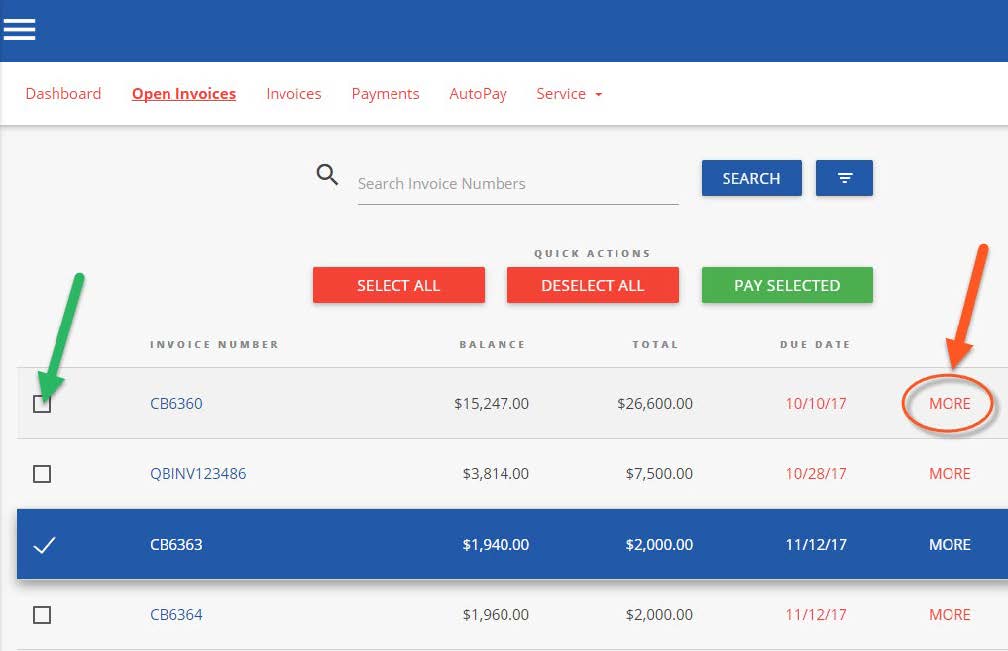
● All currently open invoices in our system are listed here. Please let us know if items are missing!
○ If needed, you may conveniently sort & filter with the three bar button.
○ Select the items you wish to pay, and click “Pay Selected”.
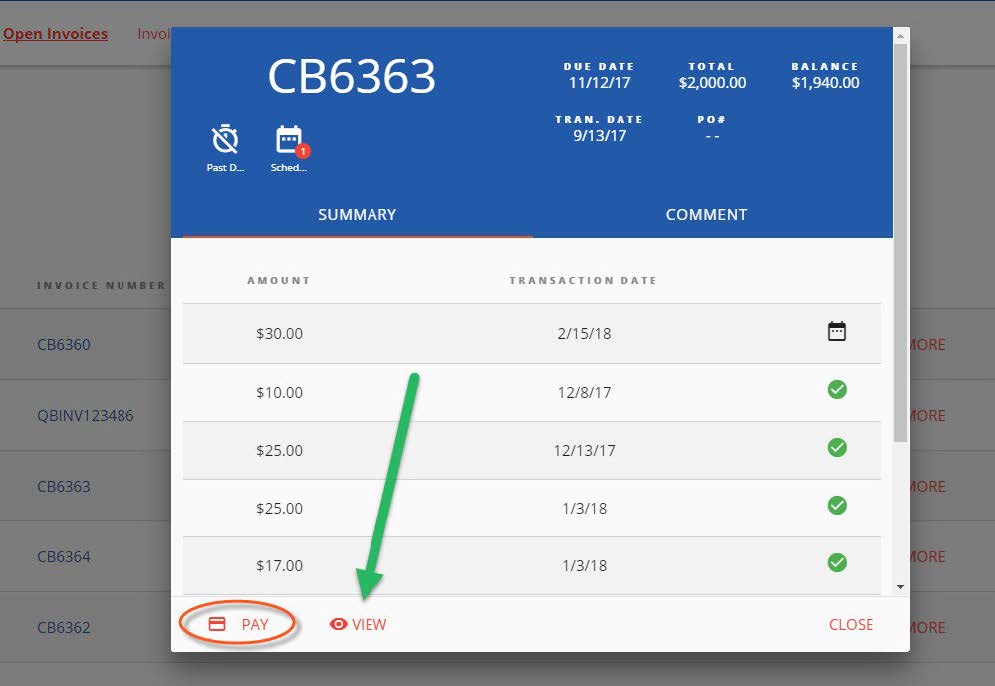
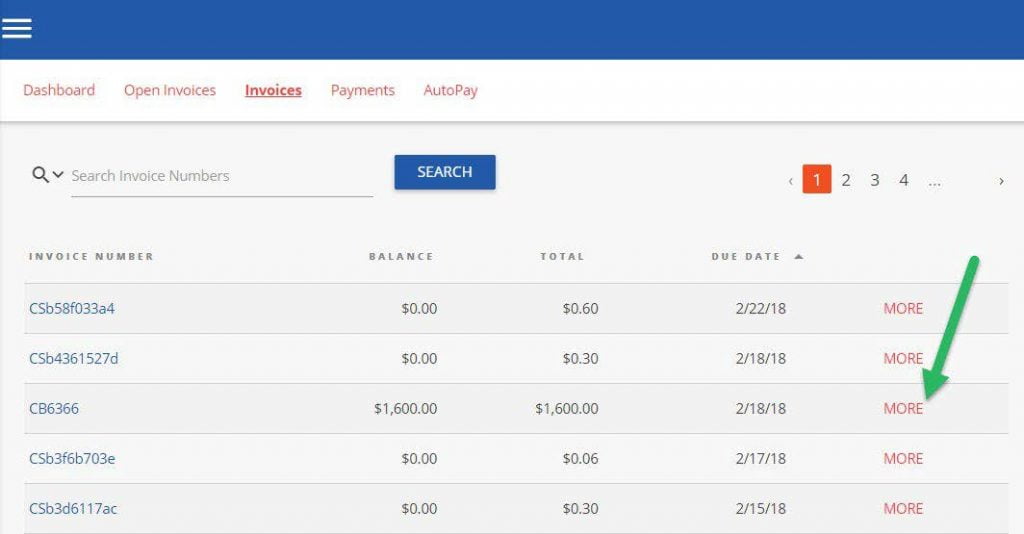
Clicking “MORE” on any invoice will display a details window:
● Please “VIEW” to see the specific line items in PDF format
○ The PDF will open in a new browser tab
■ (Encountering issues? Try using Google Chrome! Or temporarily allowing pop-ups)
○ You may print/save the PDF as desired
○ Click on “Comment” to send us an inquiry regarding a particular invoice
To Process a payment:
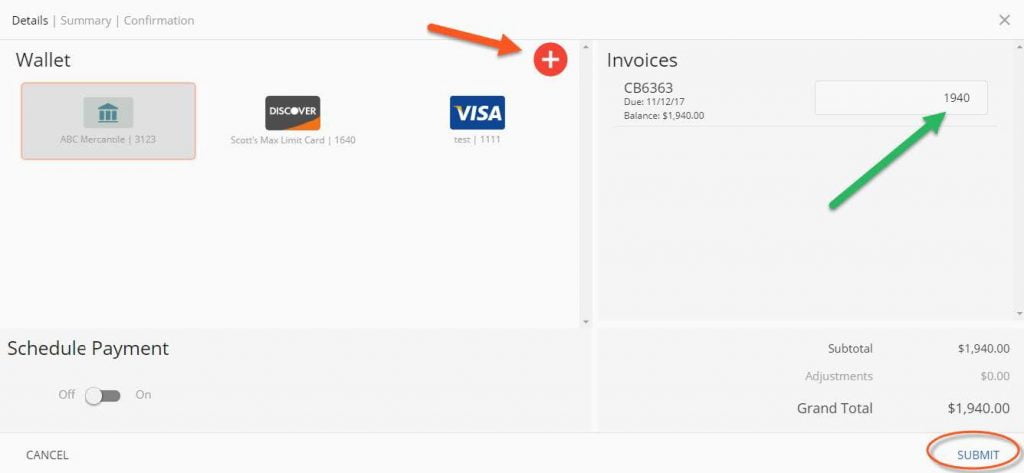
● Select the checkbox of one (or multiple) invoice(s). Click “PAY SELECTED” ![]()
○ A dialog will appear: please select a payment method on file, or add a new entry.
■ Partial payment amounts can be entered in the top right corner!
■ You have the option of splitting payments up with multiple payment methods.
Advanced Payment Options:
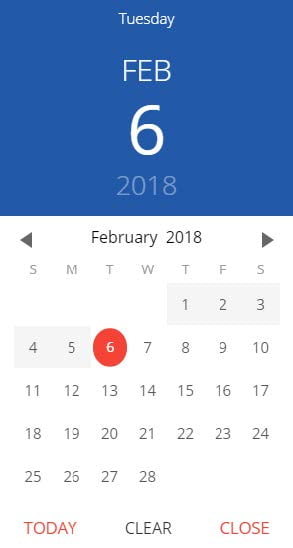
○ Selecting the “Schedule Payment” switch to “ON” offers the ability to pick a specific payment date, using the Date Picker.
■ This is not an “auto-pay”, but rather a one-time payment for the future.
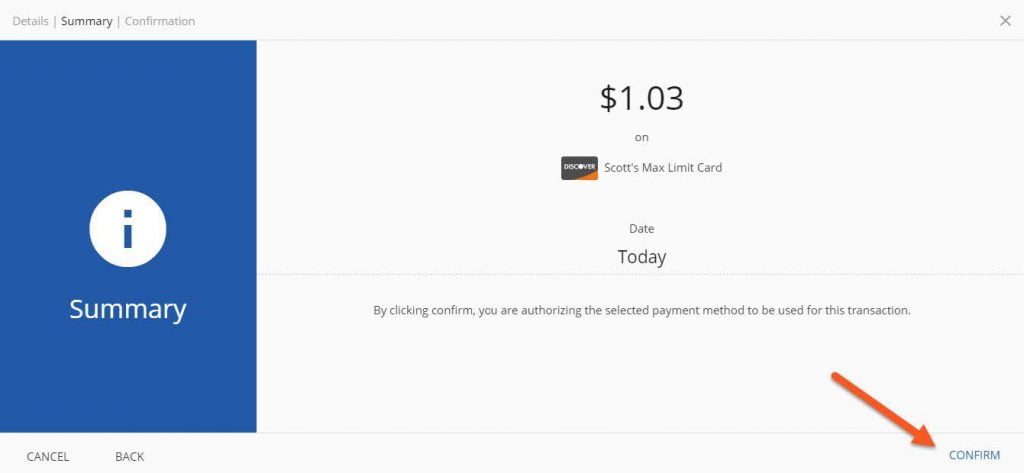
Clicking “SUBMIT” will give you a chance to review your actions.
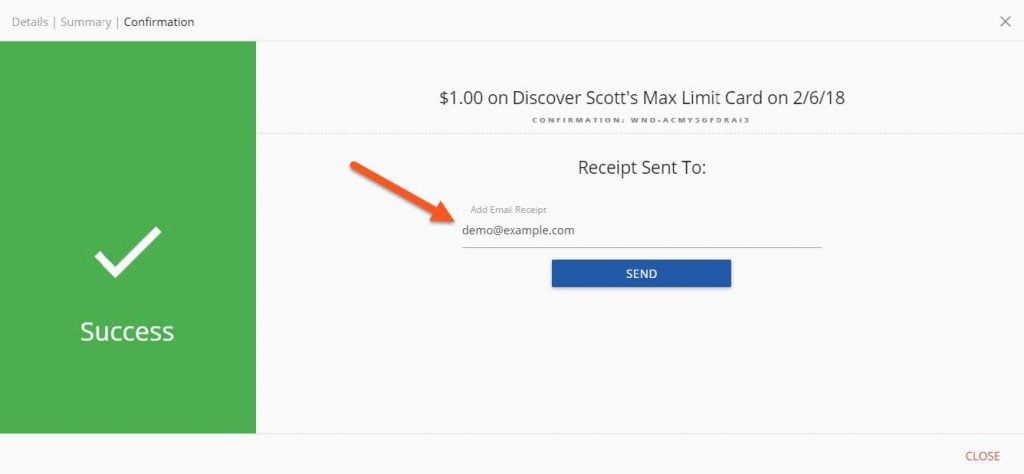
Clicking “CONFIRM” will yield a payment success or failure screen
○ An email receipt will be sent to your login email address.
■ You may send any additional receipts using the “Add Email Receipt” field.
○ If the payment is scheduled for the future, the receipt will show the scheduled payment date.
Invoice History
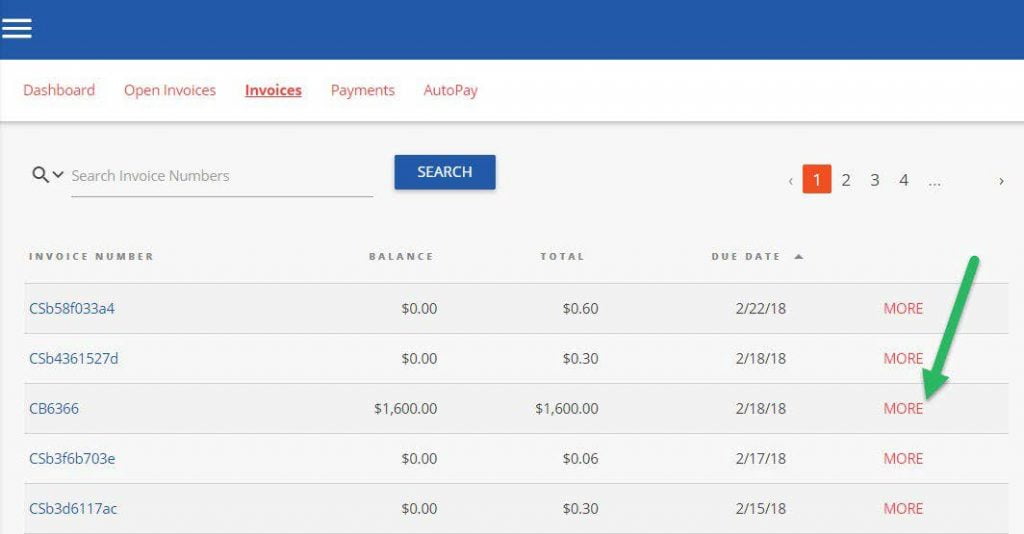
Click on the “Invoices” menu option:
● Click “MORE” on previously issued and archaic invoices
○ You may again view specific details, or print & save the PDF
○ The page numbers on the right, and search box can help narrow the results
Payments
Click on the PAYMENTS menu option:
○ View all currently pending, future scheduled (including AutoPay) or past historic payments
AutoPay
Click on the AUTOPAY menu option:
○ Click “NEW”, and expand to reveal the available options
○ Configure your preferences in 5 steps, as per the example image below
■ Note: You can have more than one “AutoPay” Rule/Condition at a time!
■ With the below “less than $” example, “one-off” type invoices can also be paid
automatically!
1 – Select the payment method you want this rule to follow
2 – “On Due Date” will pay invoices matching the criteria on the date they are due (not created)
3 – Select “Contract” or “Amount”
4 – Pick the recurring service agreement you would like to be auto-paid
5 – Save your changes!
Service
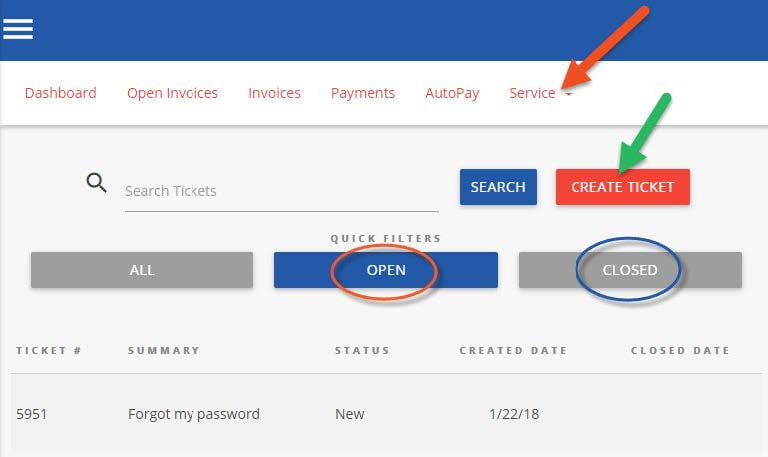
Click on the “Service” menu option:
○ Creating a new service ticket is easy as 1 2 3!
○ You may also view historic tickets with the “Closed” filter.
Mobile
Mobile device navigation:
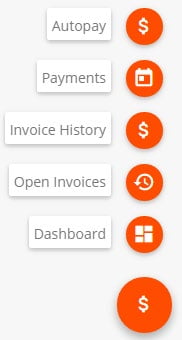
○ The top menu bar is replaced by the lower right button, but functions nearly the same.


